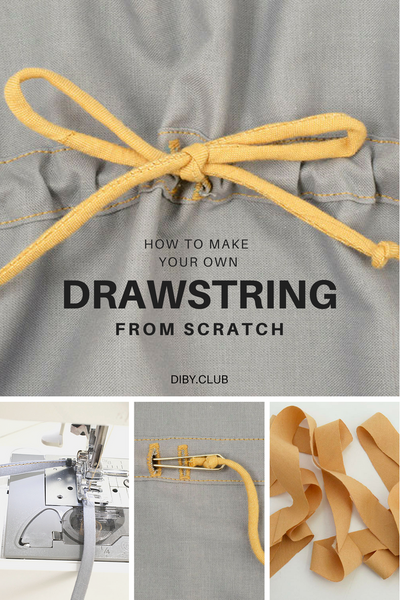
When you do a search for “how to make a drawstring” you’ll be bombarded by a million results on how to make a drawstring bag. So let’s make another shall we? Just kidding! That’s not what I’m going to teach you today. Despite what Google results tell you, there are other purposes for drawstrings. Ones you might actually use too!

What’s a Drawstring?
Drawstrings are long cords that are inserted into a casing. When you pull on the ends it’ll cinch up the fabric and it can then be tied. You might see them on pajama pants, hoodies, dresses, skirts, and even hems. There are many useful purposes for drawstrings!

What to make it with?
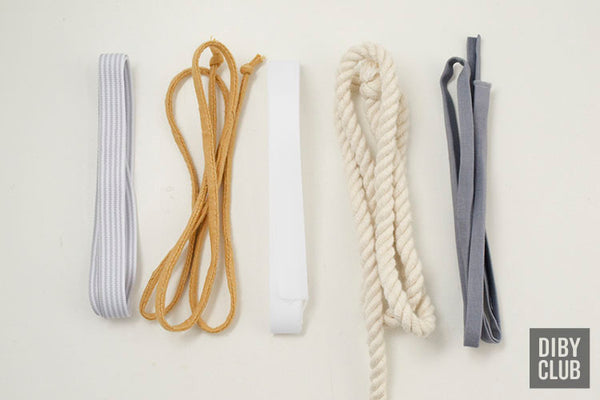
Drawstrings come in all shapes and sizes. They can be made from a twisted or braided cord, grosgrain or satin ribbon, twill tape, or self-made from cotton or knit fabric. Cording tends to feel casual or have a nautical vibe whereas twill tape or ribbon have a refined feel and are perfect for dresses like our Helen Drawstring Dress.
Self-made drawstrings are the way to go for that completely custom look. You can either match your main fabric perfectly or use a contrasting fabric!
Editor’s Note: Want to try making a drawstring? Try it on the Babe Hoodie!
Drawstring Anatomy
Casing
A casing is a tunnel-like opening between two layers of fabric. Watch our video here on how to make a casing.
Opening
You’ll have an opening where your drawstring enters your casing and as well as where it exits. Make your openings before making your casing. Make your openings only slightly larger than your drawstring so that the ends cannot easily slip back into the casing. You can use button holes, grommets, or eyelets for your openings.

Self-Made Drawstring
I’ll show you a couple different ways to make a drawstring. The same method can be used whether you’re using a woven or knit fabric. You will want to use a stretch stitch (or a long straight stitch) if you’re working with knit fabric.

First cut a strip of 1” wide fabric to your desired length. I chose a 1” wide strip because I’m using a 1/2” bias strip maker. The final width for my drawstring will be 1/4”. If you want yours to be wider then you can adjust accordingly.

After making your strip, trim one end at an angle and feed it through your bias strip maker. I want to note here that I didn’t cut my strip on the bias but with the straight grain. The results will be the same except that it won’t have as much stretch.

As your strip of fabric comes out it will be automatically folded and you’ll simply steam iron it in place. Keep pulling on the handle of the bias strip maker and ironing as you go.
You’ll now have a strip of single fold tape. Now fold it over on itself lengthwise and steam iron it again and you’ll have double fold tape which is what we want.

Take this to your sewing machine and stitch along the edge. Knots the ends and your done!

Fabric Cord Drawstring
To make a rounded drawstring you’ll start by cutting a strip of fabric 1” wide to your desired length. I did go ahead and cut my fabric on the bias for this one because I believe it gives it a rounder shape.

Fold it in half with right sides facing and you’re ready to sew. From the center, make your stitching closer to the folded edge. The width of the fabric that will be turned inside the tube will be slightly wider than the width of the tube part. This will make your drawstring feel more stable as if there’s a cord inside.

There are many ways to turn a tube but this is my favorite way. Sew one end of the tube shut and cut off the excess fabric. Then make a kind of pocket at that end by pulling the two sides of fabric apart and tucking in the end. This can get tricky when your tube is really small in which case you can use a different method.

Now insert a wooden skewer into the pocket and start sliding your fabric down over the skewer a little bit at a time. I find that if I get too much fabric bunched down at the end then it won’t turn as easily. Keep doing this until your tube is turned completely right side out.

Clip the end that was sewn together to remove the skewer. Knot the ends and you’re done!

Feeding Drawstrings Into Casings
A bodkin is a great tool to have to feed your drawstring through your casing. If you don’t have one then you can use a safety pin.

Attach your bodkin to one end of your drawstring and guide it all the way through your casing until you come out the other opening.

You now have a completely finished drawstring! I’m loving the look of this mustard and grey together. I wouldn’t have been able to find a pre-made drawstring in this color so it’s great that I was able to make my own!

--Originally written by Jessamin Jensen. Archived by Holly Hetzner.
